The Ten Fundamentals of Dental Laboratory Excellence

Discover the ten things your dental laboratory should be doing to help guarantee consistent quality.

PRO-Craft owner Greg Schubert, CDT, developed the Ten Fundamentals of Dental Laboratory Excellence based on decades of experience in the high-end boutique side of the dental laboratory industry.

These fundamentals reflect the techniques and systems he considers foundational to every restoration, including principles he learned while training in Switzerland. As dental technology has evolved, digital scanning, 3D printing and other modern workflows have been incorporated into these standards while maintaining PRO-Craft's focus on precision, craftsmanship and personalized service.

PRO-Craft Dental Lab's Ten Fundamentals Of Dental Laboratory Excellence

01 Work One-on-One With the Technician Actually Doing Your Work

This is as basic as you can get. Ask your lab to assign you a personal technician that you can talk and work with who actually does your restorations. In order to create restorations that blend into a patient’s mouth and function in a natural way, you need to talk directly with the technician doing your work.

Some conversations are too complex and time-consuming for email or text alone. While photography and study models can assist, there’s no substitute for face-to-face communication between all parties involved, especially for the unique custom work you specialize in.

However, it’s not just any technician you need; you require someone with extensive experience who can manage any case that arises in your practice and who is easy to work with and communicate with effectively. This level of expertise comes at a cost, which Big Box Labs simply won’t provide. Their focus is on delivering inexpensive crowns quickly rather than on comprehensive service and quality communication.

02 Require a Seven-Point QC Check Card With Each Case

There’s value in performing one final quality control check on the basics before sending a case to a clinician. With numerous details to consider in every lab case, the QC Check Card provides our QC technician with another chance to ensure accuracy and document everything correctly.

Just like any custom, high-value product, technicians should be confident enough to make a commitment and put their name on it.

03 Require All Work to Be Done Under a 10x Power Microscope

Nothing changes your perspective and humbles you more as a dental technician than doing your work under a 10x microscope. You learn what real precision is and what it really takes to create something with exceptional quality. It’s like seeing all the errors in your technique on a giant movie screen with everyone watching—there’s no place to run and no place to hide. You either nailed it or you didn’t.

Precision quality isn’t an accident. Margins, contacts, implants, veneers, inlays/onlays and micro-layering ceramic powders are all best done with the aid of magnification. To make ceramic materials blend seamlessly into natural tooth structure or titanium implant parts, high-quality craftsmanship can only be attained under magnification. You’ll see and feel the difference when your lab is using this tool.

You probably have already discovered for yourself the value of magnification doing chairside work. With the availability of loupes, dentists have elevated the standard of quality dentistry. They have become an essential tool in today’s dental practice.

So why should the standard of quality be different for your lab? You can achieve the perfect preparation with precise margins using loupes, but if your lab doesn’t utilize a microscope to see the intricate details, the benefits of loupes are significantly diminished. You might find yourself adjusting contacts they missed or blending margins because they couldn’t see them clearly. What’s the point?

Big Box Mega Labs shy away from this approach, deeming it unnecessary and too expensive to adopt and maintain. The choice is yours—what kind of dental practice do you envision for yourself?

04 Use a Multi-Powder Segmented Layering Technique on Anterior Restorations

Your lab must be using a Multi-Powder Segmented Layering Technique on all your anterior restorations. All translucency and mamelon effects should be hand layered into the restoration using the techniques of the Masters.

Most labs are using various staining techniques applied to the surface of the crown to create their translucency. This technique will never match natural dentition in a quality manner. The investment in training skilled technicians is something that most labs will only do to a point. To reduce cost, the staining technique has become the most popular and is widely used.

Ask your lab if they hand layer and multi-powder segment your anterior restorations. Chances are, especially regarding the segmenting technique which involves intricate artwork, the answer will be no.

Most likely, your work is being milled with a layered zirconia disk and then finished with simple blue and grey stain and glaze. Look for a lab that hand layers and segments their build-up to simulate the way a natural tooth grows and develops. A skilled ceramist understands how to manipulate build-up to maintain light transmission in the restorations and achieve a natural appearance.

Think about it: if you have pure translucent ceramic, it will appear very low in value or grey because the light passes quickly straight through the material. If dentin or other ceramic materials are added, they will reflect and refract the light, bending it and slowing it down, raising the value and bringing the work to life.

A skilled ceramist understands how to create depth with chroma and hue, infusing natural warmth into their work. Without natural warmth, your restoration has no pulse, no heart and in the end just looks dead like the ground rock it comes from. If you want a reputation for high quality in your community, this talent must be valued and acquired in your practice. Make sure your lab is trained in these techniques.

That being said, building ceramic layers is very much like the oil paintings done by the famous artists of old. Just because you have paint-by-number instructions on how to do it doesn’t mean much. Unless they’ve spent many hours of dedicated practice, you’ll never even get close to creating a Rembrandt.

05 Hand Pumice and Polish All Ceramic and Zirconia Surfaces

This is a must-do. Have your lab hand pumice and polish all ceramic and zirconia surfaces and do the same to all glaze surfaces to reduce wear of opposing teeth and replicate natural tooth surfaces.

This one step will make all the difference in your esthetics and elevate your practice in preventative dentistry. The poor texture of a restoration will be a dead giveaway, especially in demanding anterior cases. Texture can actually create illusions to make a restoration look wider or narrower. It can also raise the value of the restoration by diffusing the light on the labial surface. Equally important is how it improves your patient’s overall experience.

If you ask your patient, they will likely tell you their natural teeth feel very different than the widget crown you just seated from the Big Box lab.

Their natural teeth are smooth, unlike the rough texture often found on crowns finished with spray glaze. Hand polishing and pumicing the ceramic/zirconia surface before and after hand glazing ensures two things. First, when the glaze on the occlusal surface wears off, there will be no rough areas to damage the opposing dentition. Second, when the glaze surface is also polished, the rough surface created by the microscopic ceramic particles in the glaze will also not be abrasive to the opposing dentition and will look like natural tooth structure.

If this step is missed on zirconia or any other ceramic material, the crown can devastate the opposing dentition. Maybe you’ve seen this firsthand in your practice and there is no reason for it. Following correct techniques and taking the time to prevent this only requires the willingness to make the improvement.

06 Do Not Scan PVS Impressions With Conventional Desktop or Micro CT Systems

Your PVS impressions should never be scanned by conventional desktop or Micro CT scanning systems to manufacture your crowns or models.

These systems are gaining popularity among laboratories because they streamline the lab process and reduce expenses. Moreover, finding skilled technicians has become increasingly difficult, and the cost and time required to train new talent from scratch is significant. While these systems will continue to grow in popularity, they will adversely affect the consistency of your lab work.

For a brief period, we experimented with both of these systems but ultimately discontinued their use. Sometimes, learning the hard way is necessary. Neither system is capable of capturing the intricate detail of margins or the precise definition of sharp prep tips like a PVS impression can. This often leads to short margins and poorly fitting restorations.

It’s important to remember that the most frequent issue we encounter at our lab is poor management of tissue and moisture during impression taking. It’s also common to receive impressions without a packed cord, which obscures clear and precise margin visibility. Neglecting this step means the lab can only estimate the margin, which doesn’t align with our standards of precision and quality. Under magnification, it’s crucial to distinguish where the bur marks end and the smooth tooth structure begins. Investing time in this step pays off in significant dividends, regardless of the impression method used. A poorly taken impression remains inaccurate, regardless of the technology.

07 Require Un-Sectioned Models With No Moving Parts and Separate Dies

It is common practice to make digital or stone models with removable dies and removable sections to make working on the case easier and more convenient for the lab. But doing this lends itself to many opportunities for error on contacts and occlusion.

Since you can’t remove sections in the patient’s mouth when seating a restoration, it only makes sense that your lab shouldn’t either. If you want your lab to experience what you do in the patient’s mouth, like path of insertion and contact issues, request that they do all fabrication on an articulated un-sectioned model.

On the topic of working models, tell your lab digital models fabricated using DLP print technology are not accurate enough to guarantee consistent fit of your implants. The same goes if you’re involved in large full-mouth reconstruction cases that are not implants. Tell your lab you want these cases done with a high-quality die stone that is regularly tested in their lab with the proper equipment for proper stone expansion. Also, let them know you want the model un-sectioned and to use separate dies.

The only digital printer currently on the market that will solve these issues are poly jet printers. The poly jets are very expensive but will deliver consistent, accurate results time after time for full-mouth and intricate implant restorations.

08 Use Digital Computer Scales for Stone Models From PVS Impressions

Human error remains a factor. Unless your lab relies on digital scales and digital liquid dispensing, your consistency will always be hit and miss. With this technology, the technician places a bowl containing stone on the scale and presses a button, automatically dispensing the exact amount of liquid into the stone or investment. It’s as close to automatic as it gets. Models consistently achieve accuracy without fail, resulting in exceptional fits. Remember, the quality of your stone models hinges on the expansion of the stone. Ensure your lab measures each bag before use.

09 Test and Calibrate Each Bag of Die Stone

If a crown doesn’t fit, your lab will probably tell you it was due to your impression. Maybe it was, and maybe it wasn’t. Most clinicians and lab technicians are unaware that die stone from manufacturers isn’t always as accurate as they claim. Some brands are better than others, but all are subject to variation. The high standards we expect cannot tolerate such inconsistency.

When Greg was training in Zurich, he spent time in the lab of Walter Gebhart, a Master technician who taught him about stone expansion. Walter introduced him to an instrument used to test each bag of die stone when it’s opened. It’s the only way to guarantee the accuracy of your models. This instrument will tell you if the batch of stone is good to use or not; without it, you’re relying on the manufacturer for your quality.

10 Require Natural Fluorescence in All Zirconia Anteriors

That’s how real teeth are, and that’s how your lab should make your zirconia anterior restorations. All monolithic zirconia materials on the market do not fluoresce like natural teeth. Even if the zirconia has a translucent layer built into the disk, it still lacks fluorescence.

You can check for yourself by using an inexpensive Halloween black light. Light is what brings your restorations to life—light is life.

The reason labs don’t provide this effect is that it’s expensive and time-consuming. Most technicians and clinicians are unaware of this crucial element of natural teeth and don’t realize it’s missing from their materials.

Fluorescence is one of the big three in quality dental ceramics. Without opalescence, iridescence and fluorescence, there’s just no way to match the shade on a single central with exceptional quality and ensure it seamlessly blends into the patient’s mouth.

So, What’s Your Next Step?

The experience you create for your patients extends beyond the treatment you provide. The quality, consistency and attention to detail behind every restoration all play a role in how your practice is perceived.

At PRO-Craft, we’ve spent decades training high-end dental ceramists and working one-on-one with clinicians who share our commitment to exceptional dentistry. We intentionally remain a boutique dental laboratory so we can provide the craftsmanship, communication and personalized service our clients expect.
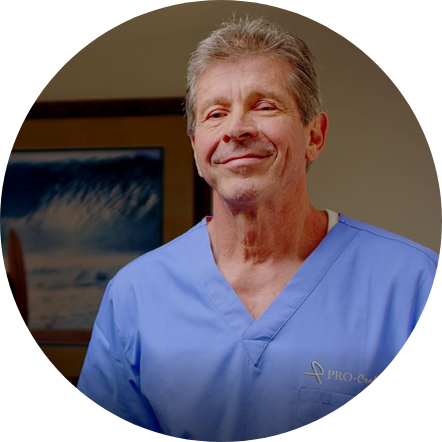
Greg Schubert, CDT, Owner of PRO-Craft Dental Laboratory

Dedicated to building your Dream Team,

Greg Schubert, CDT

Owner, PRO-Craft Dental Laboratory

Ready to Put These Standards Into Practice?

Partner with PRO-Craft and bring the same focus on precision, craftsmanship and personalized service to your restorative workflow. Request your free Dental Practice Starter Kit to learn more about getting started with our lab and working one-on-one with a dedicated technician.

Request Your Free Starter Kit

What Other Doctors Are Saying…

"Always exceptional work from PRO-Craft. They go above and beyond to deliver high-quality restorations."

— Dr. Amanda W.

★★★★★

"Their team is so responsive and helpful. Having a dedicated technician makes all the difference."

— Dr. James K.

★★★★★

"Excellent quality and reliable turnaround times. PRO-Craft is a valuable extension of my practice."

— Dr. Emily R.

★★★★★

"Highly recommend PRO-Craft to any dentist looking for top-tier lab work and support."

— Dr. Michael T.

★★★★★

"I've worked with several labs, but none match the consistency and craftsmanship of PRO-Craft."

— Dr. Laura S.

★★★★★

"From crowns to implants, every case comes back perfect. They truly care about results."

— Dr. Brian L.

★★★★★
logoSmall

As an industry leader in CAD/CAM technology, we have taken the fabrication of digital restorations to a new & exciting level of service.

25791 Jefferson Ave, Murrieta, CA 92562
info@pro-craft.com 
877-484-3522

Search The Site